Superficial Subcutaneous Layer
The Superficial Subcutaneous Layer — Where Injection Anatomy Actually Begins
So, we finally get to the subcutaneous layer — the first real landmark in injectable aesthetics. The first layer that matters to your hands more than your eyes. The first layer where the cannula stops being a tool and starts becoming a conversation. And the first layer where your decisions directly translate into a fresher, softer, more awake-looking face.
People like to say, "It's mostly fat down there."
That's technically true.
But technically true statements have ruined more injectors than bad technique.
Because this layer isn't "fat."
It's a composite biological material — a living fabric made of soft lobules, fibrous septa, ligament branches, loose glide planes, vessels, nerves, and a lifetime of expressions written into the terrain.
This is the layer that defines the youthful face.
This is the layer patients notice first when it collapses.
And this is the layer that gives you the fastest, safest, and most elegant results when you restore it.
Deep fat gives structure.
Superficial fat gives shape.
And shape is the language of beauty.
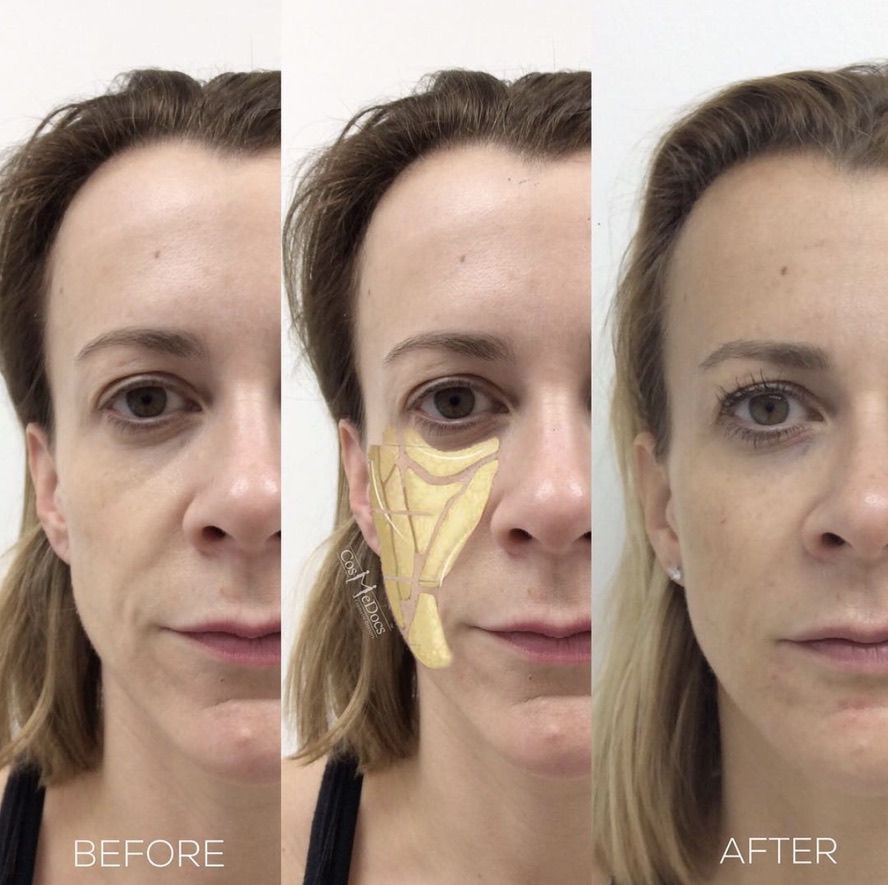
Look at this face. The change isn't about "filling the cheek" or "treating the tear trough" or "softening the nasolabial fold" as if they were separate problems. They are the same problem — subcutaneous volume loss — expressed in different territories.
When the superficial fat thins, the face doesn't shrink uniformly. It collapses into dips: the cheek loses its forward projection, the lower lid hollows into a tear trough, the midface descent deepens the nasolabial fold (a fold — not a crease; learn to differentiate, because creases sit in the skin and folds sit in the volume beneath it), the marionette line drops the corner of the mouth, and the pre-auricular area in front of the ear sinks into a quiet hollow most patients can't name but everyone can see.
The fat compartment maps are useful, but they confuse the plan when you treat them as separate destinations. Anatomically the compartments are divided. Clinically, from the patient's point of view, they are one continuous layer of lost volume — and that's exactly what you are restoring.
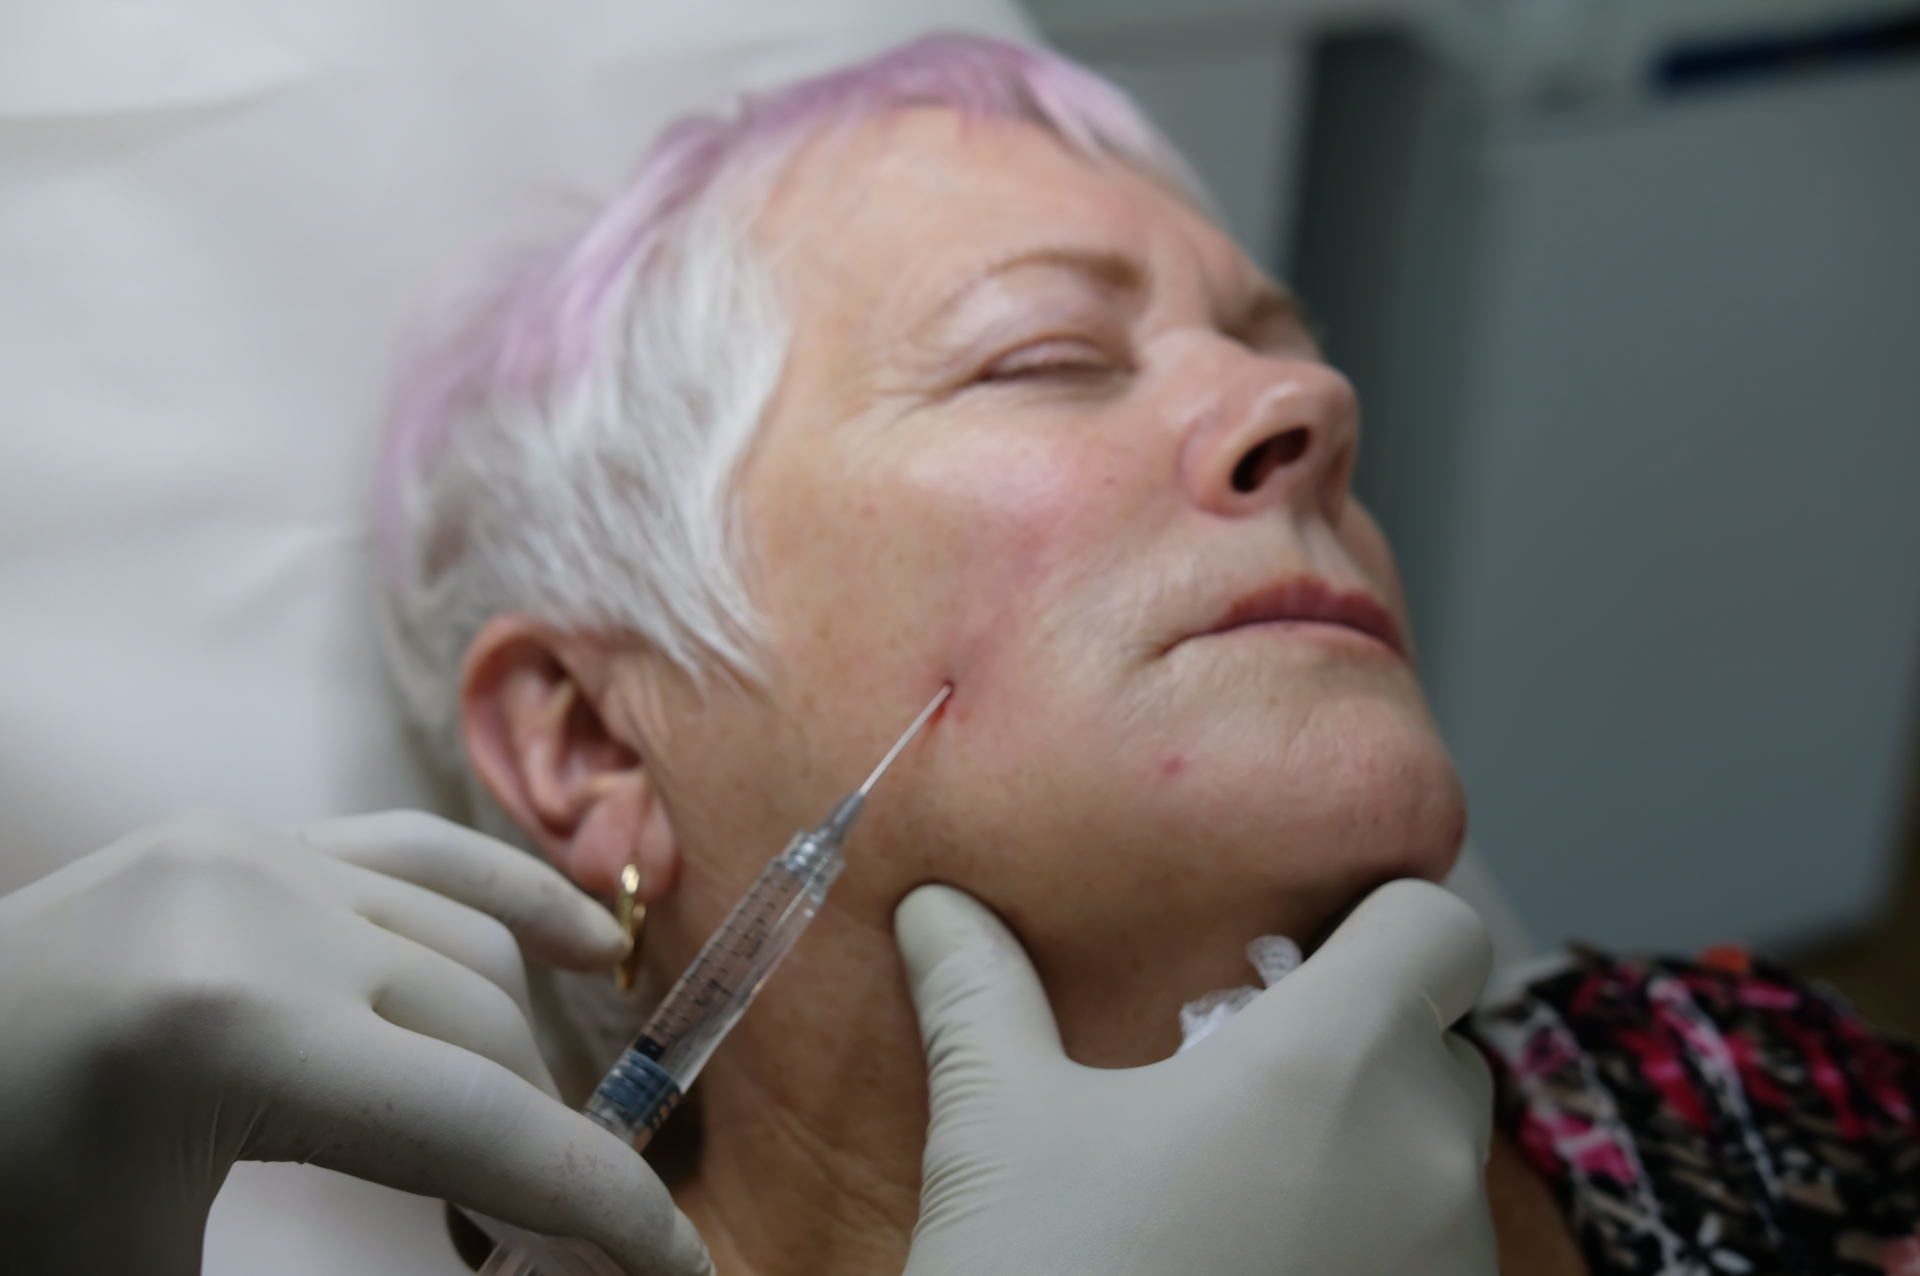
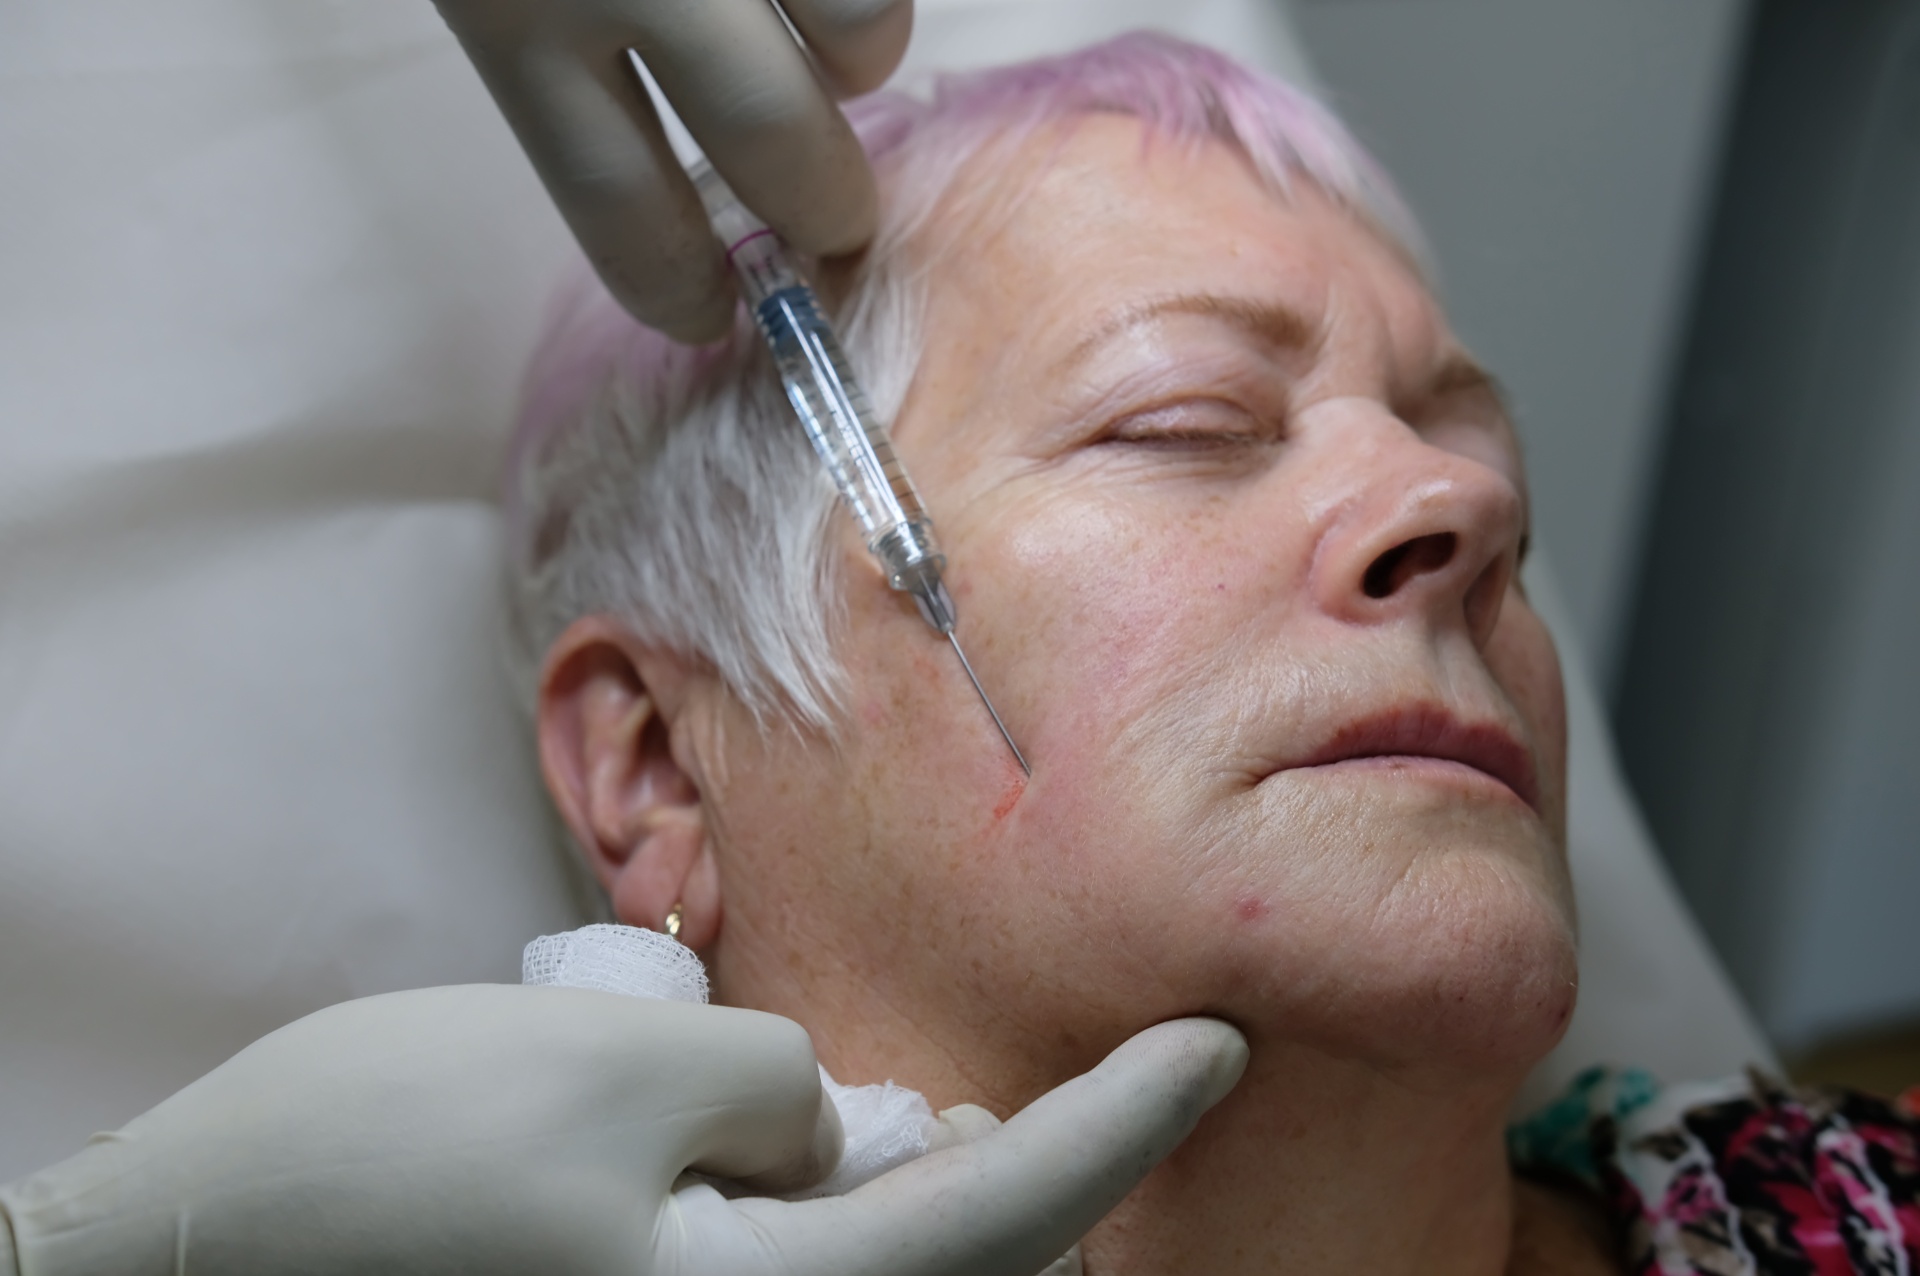
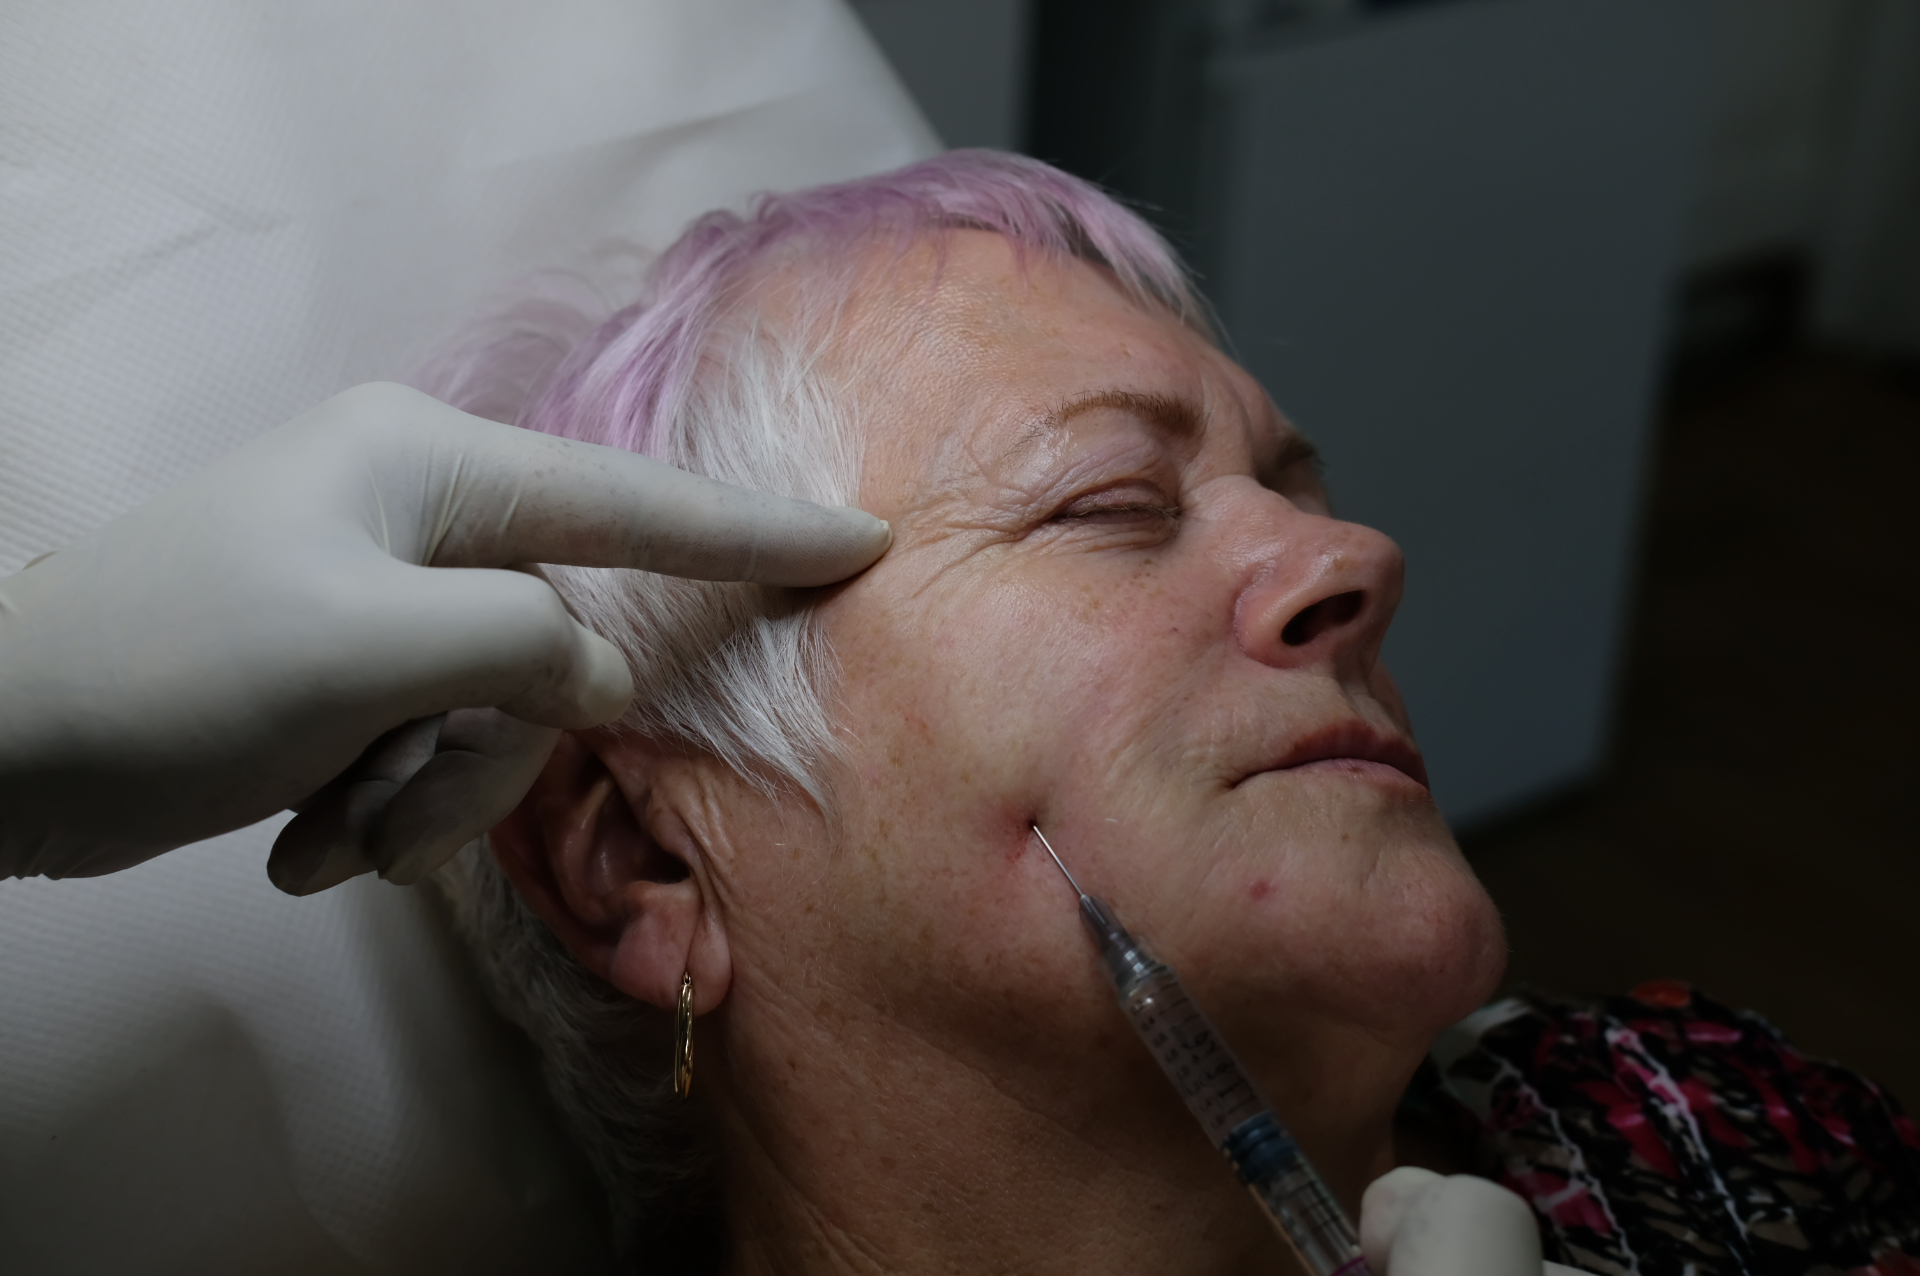
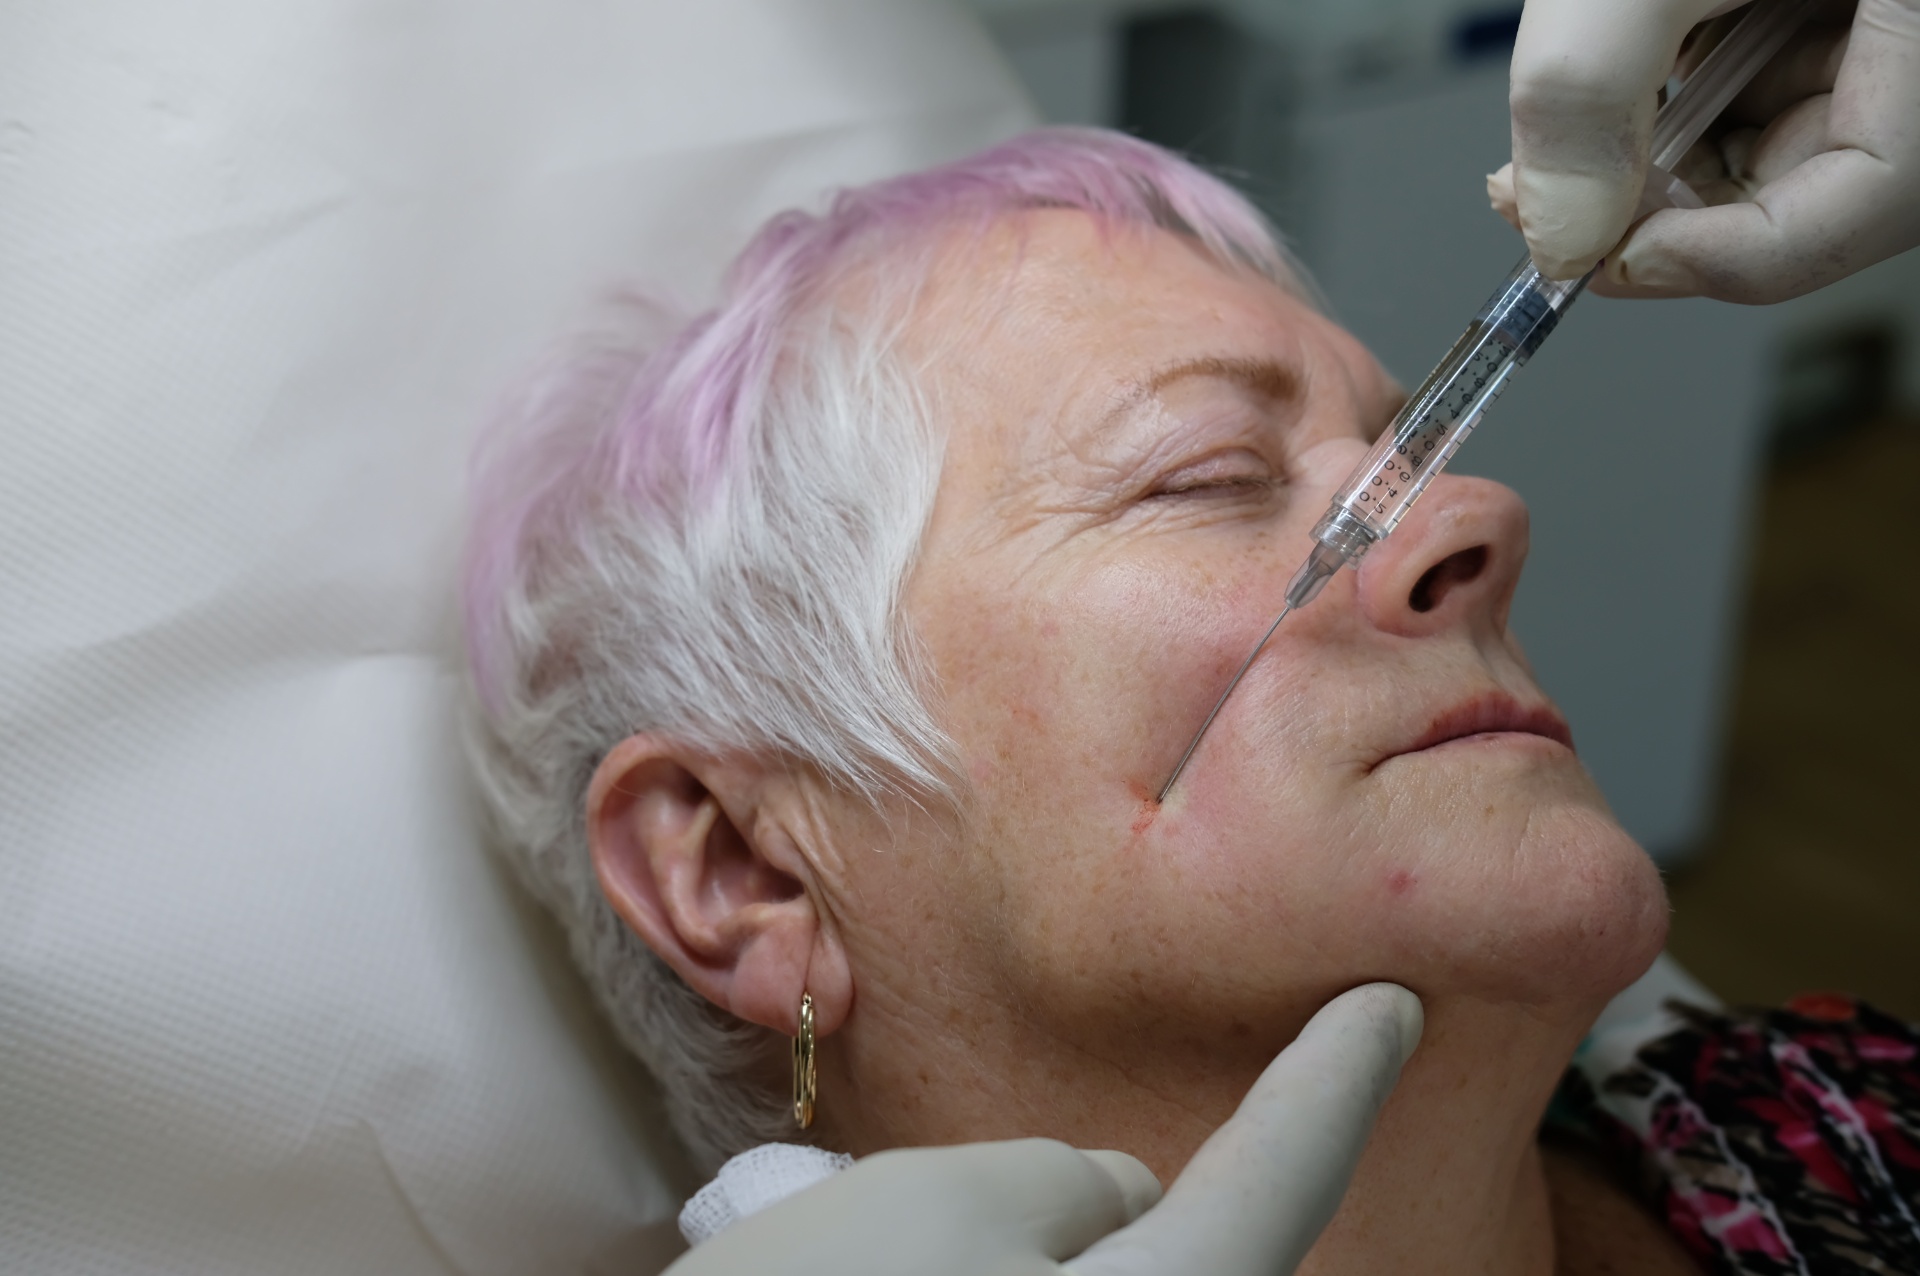
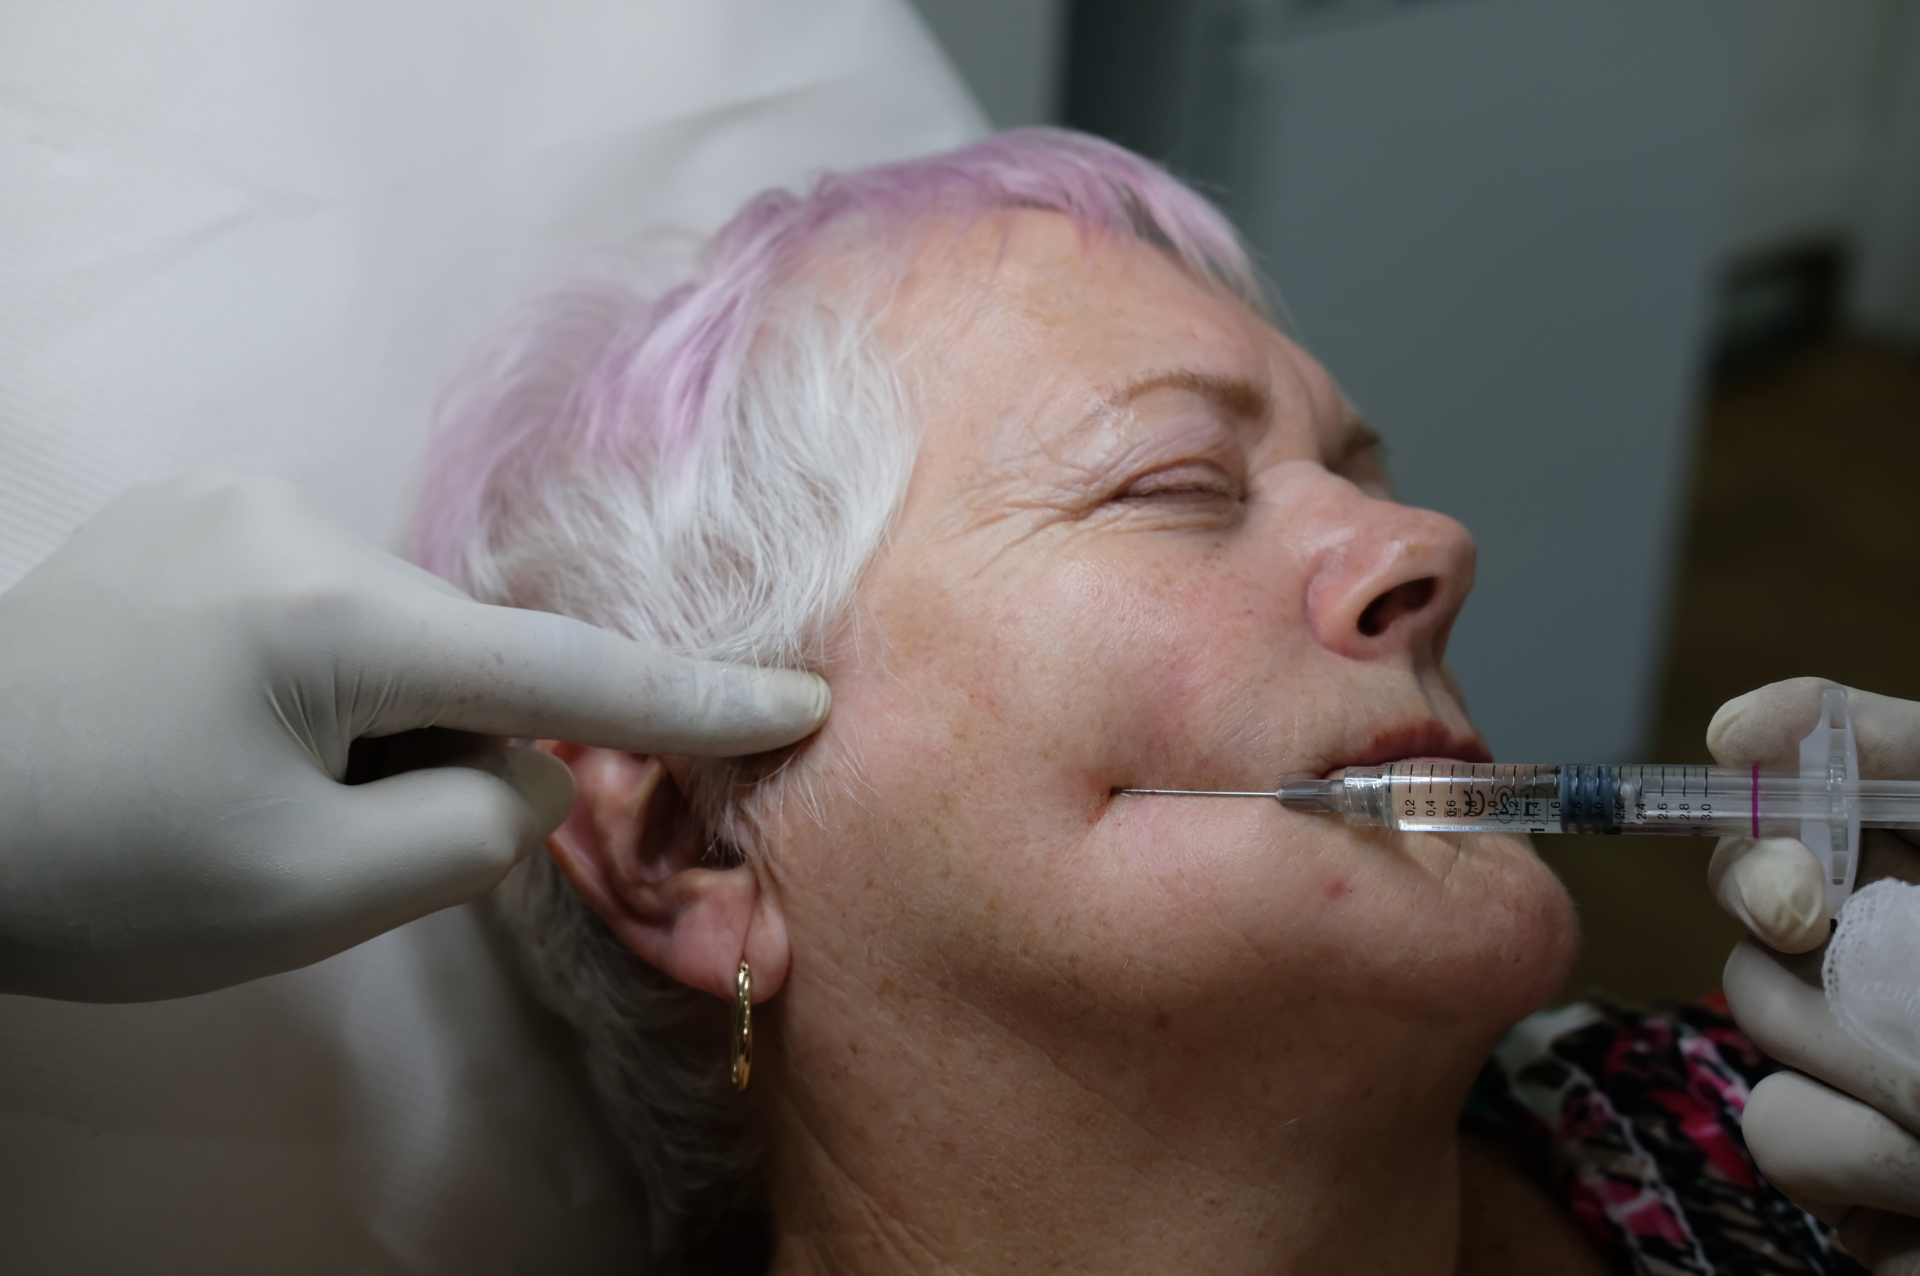
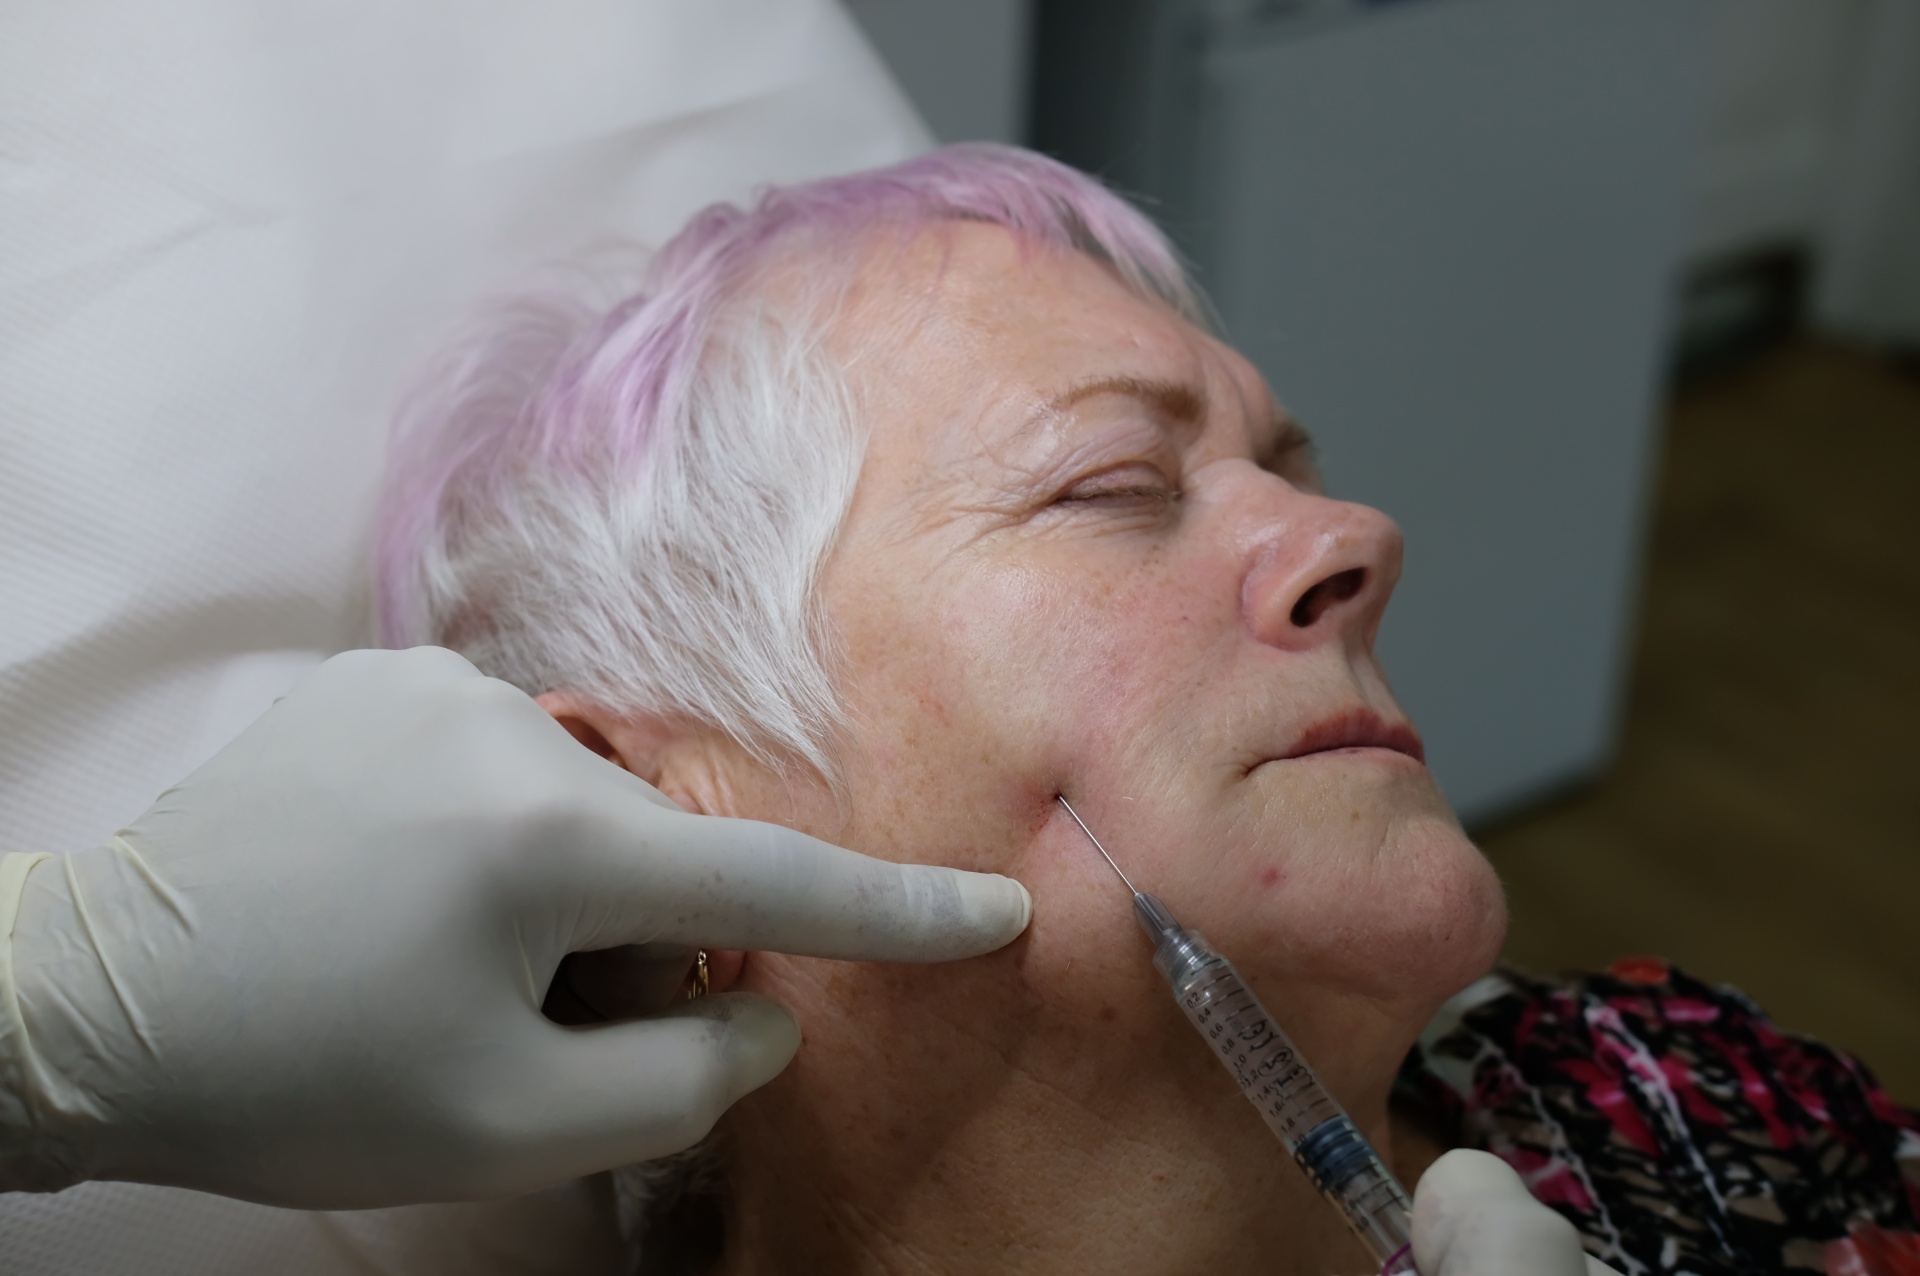
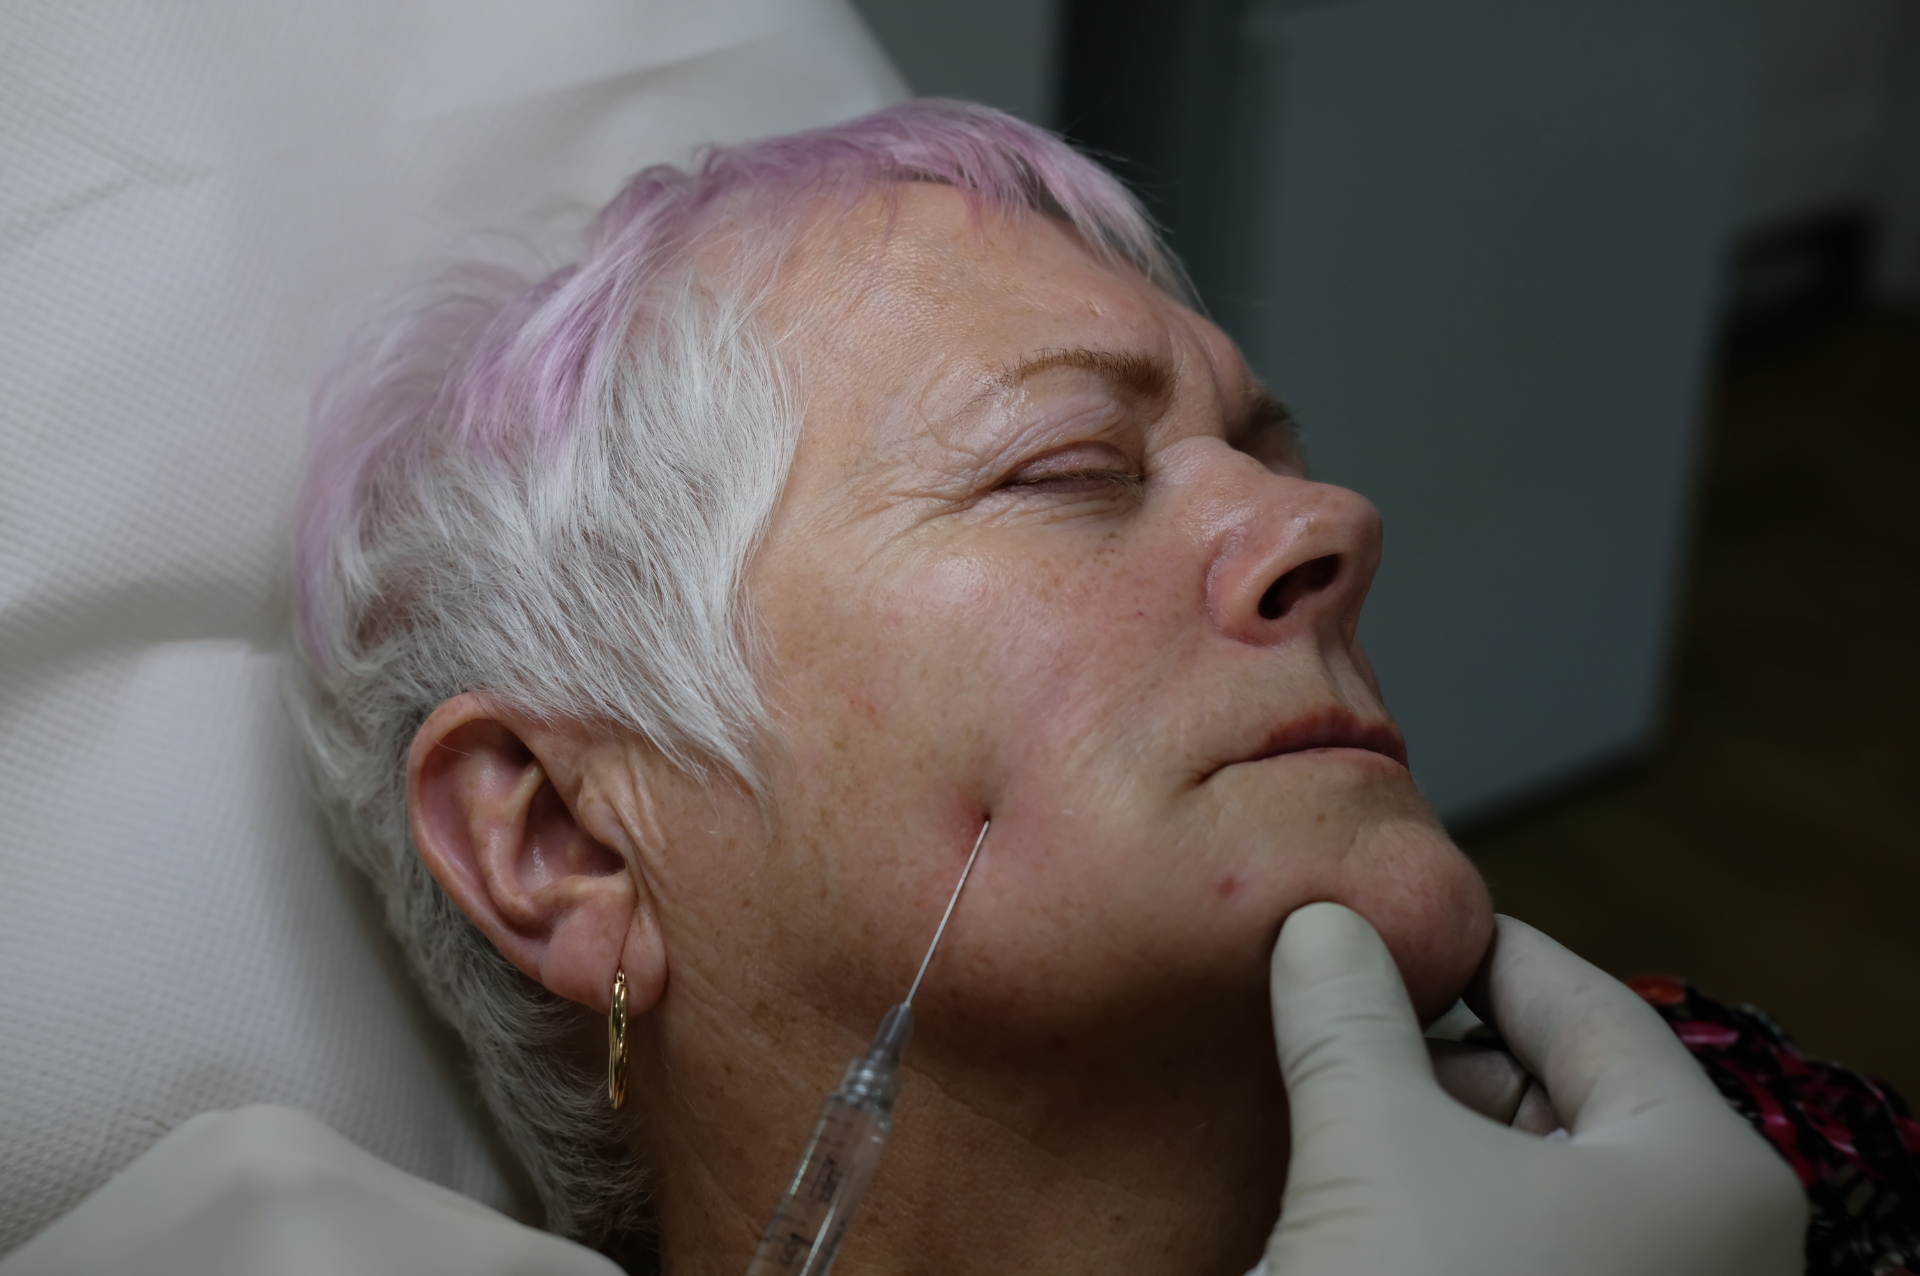
The technique is honest and simple. You make a single insertion point. You slide the cannula under the skin and dermis, on top of everything important, into the superficial subcutaneous plane. And you fill what is sunken. You follow the dip. You restore the contour the patient was born with. Nothing more, nothing less.
Watch the cannula across these seven shots. The entry point barely moves. The depth never changes. The cannula sits exactly where it should — right under the skin, in the superficial subcutaneous plane — and from that single corridor it reaches the temple, the lateral cheek, the mid-cheek, the nasolabial fold, the perioral area, the marionette line and the jawline. The fat compartment maps make the face look like seven different problems. The cannula proves it is one.
Why This Layer Deserves Your Respect
Superficial fat is the first thing we lose with age.
Before bone resorbs, before deep fat shrinks, before ligaments sag — this layer starts to thin out.
When that happens:
- Shadows appear where there used to be light
- The mid-cheek groove forms
- The tear trough looks darker even before it hollows
- The jawline softens into early jowls
- The face loses its "energy," its bounce, its youth
Restore this layer, and you restore expression before structure.
And that's why even older patients with deep fat loss instantly look fresher when this layer comes back to life.
This is the low-hanging fruit of aesthetic medicine.
You don't need deep injections to change someone's day — you need to give the superficial layer back.
The Four Textures of the Superficial Layer (The Composite Material)
If you understand these four elements, you understand the entire superficial layer.
1. Fat Lobules — The Glide Zone
Soft, deformable pillows that part easily.
This is the "warm butter" your cannula glides through.
The most forgiving tissue in the face.
2. Fibrous Septa — The Cobwebs
This is the internal architecture.
They give you tiny catches — little "micro-grinds" — just enough to remind you the face has structure.
3. Superficial Ligament Branches — The Flexible Fences
These are the arborised tips of the retaining ligaments.
Up here, they're gentle.
You glide over them without effort.
It's only when you go deeper that they become stiff vertical walls.
4. Loose Areolar Tissue — The Superhighway
The suspiciously easy glide.
Move your hand 2 mm, and the cannula travels 20.
If it feels like you're cheating, you're in the right place.
And through all of this run the rubbery cables — arteries, veins, and sensory nerves — each with its own personality.
This layer isn't anatomy.
It's navigation.
Material Science for Injectors — Metal Meets Tissue
Advancing a cannula through the superficial layer is the closest aesthetic medicine ever gets to physics class:
Soft fat deforms
→ smooth, frictionless glide
Septa resist lightly
→ gentle catches
Ligament branches deflect
→ "No entry here. Try another route."
Ligament trunks (deeper) block
→ the "brick wall" sensation
Fascia stops you dead
→ wrong plane
Vessels stretch
→ slide away like elastic tubes
Nerves stretch
→ then fire → time to pick a new direction
These sensations form a force–displacement graph in your fingertips.
You're not pushing a cannula — you're reading a language.
The more fluent you become, the safer you become.
Correct Entry Technique — How to Enter the Layer the Right Way
This is where most injectors go wrong.
They think the cannula navigation starts after the entry point.
Wrong.
It starts with the needle.
1. The Entry Hole — 2–3 mm Deep
Just enough to pierce the dermis and drop into the subcutaneous layer.
Not deep enough to hit fascia.
Not shallow enough to cause drag.
2. Entry Angle — 20 to 30 Degrees
Small enough to avoid diving deep.
Steep enough to open a clean tunnel.
3. Advance the Cannula Through This Tunnel
The first resistance you feel is the dermis pushing back.
That's normal.
A bit more pressure and the cannula "pops" through into fat.
4. Immediately Flatten the Cannula — Parallel to the Skin
This one move changes everything.
Parallel = superficial.
Superficial = safe.
Parallel is the injector's seatbelt.
If you enter at a downward angle and never correct it, you'll drift deeper.
If you flatten immediately, the cannula stays where you want it — in the silky top half of the subcutaneous layer.
Cannula Alignment: Concave, Convex, or Neutral
This is the kind of detail only injectors with thousands of faces learn — so you're getting it early.
Concave (bent downward)
When you push, you're driving deeper.
This is how beginners accidentally glide toward the SMAS or deep fat.
Convex (bent upward)
You scrape against the inside of the skin.
You tent the skin.
You're too superficial.
Neutral / Straight
This is the sweet spot.
You glide through the superficial fat like you're meant to.
No tenting. No diving.
Just smooth, purpose-built navigation.
Just a short video to show when you're in the right plane how easy it should be.
Hold your syringe parallel to the skin.
Your cannula will follow.
Why It's Hard to Accidentally Go Too Deep
Injectors worry too much about "depth."
The truth is:
It's actually very difficult to slip deep into the SMAS or deep fat by mistake.
Why?
- The superficial fat layer is thick
- Deeper fascia blocks you
- Ligament trunks push you away
- Cannulas bend before they dive
- The path of least resistance is always superficial
You almost always glide above the obstacles, not under them.
This is why superficial work is beautifully forgiving — and why beginners should start here.
The Tactile Table — What You're Actually Feeling
You MUST include this in the chapter for your readers.
No one teaches this.
This is the difference between "injecting" and "injecting well."
| Structure | What It Feels Like | What It Means |
|---|---|---|
| Fat | Smooth, silky, low resistance | Perfect plane |
| Septa | Mild drag, cobweb tension | Still correct, small adjustments |
| Ligament branches | Soft deflection | Glide over; stay superficial |
| Ligament trunks | Brick wall stop | Too deep; withdraw & redirect |
| Fascia | Sharp, total resistance | Wrong plane |
| Loose areolar | "Too easy" glide | A glide plane — enjoy it |
| Vessel | Rubber-band behaviour | Keep moving, low pressure |
| Nerve | Zap, radiating | Stop, withdraw, change path |
This is the entire essence of injection anatomy.
How to Flip the Cannula and Change Direction
Once the cannula is in the correct plane, you rarely move in a straight line for the whole treatment. You need to redirect — to fan, to cross a ligament branch from a better angle, or to reach a neighbouring dip without making a new entry hole. That redirect is done by flipping the cannula.
The flip is not a violent rotation. It is a controlled, low-friction redirection of the blunt tip within the same superficial plane. Done well, the patient feels almost nothing. Done badly, you lose depth, catch a septum, or tent the skin.
The Anatomy of the Flip
A cannula has a bevelled, blunt tip. The tip wants to follow the path of least resistance. When you rotate the hub, the tip turns. But the shaft also has memory — it wants to stay where it is. The flip succeeds when you release the memory gently and let the tip find a new corridor in the same plane.
1. Stop advancing
Never flip while you are still pushing forward. Pause, release pressure, and let the tissue settle around the shaft.
2. Withdraw 2–5 mm
Pull the cannula back slightly to free the tip from any septum or ligament branch it is leaning against. This gives the tip room to rotate without digging deeper.
3. Rotate the hub, not the wrist
Turn the syringe between your fingers. The rotation should come from the hub, not from twisting your wrist. A stable wrist keeps the depth constant.
4. Feel the tip settle
Wait for the loss of resistance. When the tip is free, it will feel light again. If you still feel drag, withdraw another millimetre and try a slightly different angle.
5. Advance in the new direction
Re-establish the parallel position and move forward smoothly. The first few millimetres tell you whether you are still in the correct plane.
Why Flipping Matters in the Superficial Plane
In the superficial subcutaneous layer, the cannula can reach most of the face from a single entry point — but only if you can redirect it. Without a clean flip, you make unnecessary entry holes. Unnecessary holes increase bruising, infection risk, and patient discomfort.
More importantly, the flip lets you respect the architecture. You do not punch through ligaments. You glide around them. You do not drag through septa. You find the soft corridor.
💬 Dr. Haq Says:
"The flip is where the cannula becomes an extension of your thinking. You do not force it. You ask it to turn, and you listen to whether the tissue agrees."
Common Mistakes
Flipping while advancing
This forces the tip through septa and ligaments. It causes pain and increases the risk of bruising or depth loss.
Rotating from the wrist
Wrist rotation changes the angle of the whole shaft. It is the fastest way to drop from superficial to deep or to tent the skin.
Not withdrawing first
If the tip is already leaning against a septum, rotation will grind it into the tissue rather than redirect it.
Forcing 180 degrees in one motion
Large direction changes are better done in two or three smaller arcs, each with a pause and reset.
The Ligament Table (Only What Matters in THIS Layer)
| Ligament | Deep Origin | Superficial Behaviour | Injection Note |
|---|---|---|---|
| Orbital retaining ligament | Orbital rim | Strong tether at tear trough | Stay superficial or go just below |
| Zygomatic cutaneous ligament | Zygoma | Feels like a wall over cheek | Glide ABOVE it from lateral vectors |
| Masseteric cutaneous ligament | Masseter fascia | Divides cheek compartments | Angle up or down; don't punch through |
| Mandibular ligament | Mandible periosteum | Creates jawline step-off | Superficial is safest |
| Temporal ligament | Temporal fascia | Limits lateral brow movement | Choose superficial or deep, not mid |
This isn't the ligament chapter —
it's the navigation chapter.
This table belongs here because this is where you FEEL them.
What Happens When You Come From the Hairline Toward the Cheekbone
Injectors constantly ask this:
"If I enter from the hairline and head toward the cheek, do I end up deep or superficial?"
Here's the truth:
You almost ALWAYS stay superficial to the zygomatic ligament.
Why?
- The superficial fat is the path of least resistance
- Ligament trunks block downward movement
- The architecture naturally keeps you above the SMAS
- You would need intention to go deep
This is why the lateral-to-medial cheek approach is safe and predictable.
You hit the ligament wall, glide above it, and sculpt the malar region safely.
And yes — we will cover cheek vectors in detail in the Cheek Chapter.
Watch the tethering as the cannula is advanced — each tug marks a ligament branch being crossed. Fat itself rarely offers resistance; what you feel is the fibrous architecture.
Mid-Cheek Entry From the Mid-Cheek Groove
This is one of the cleanest, most controllable superficial entries in the face.
From the mid-cheek groove:
- You enter 2–3 mm
- Flatten immediately
- Glide medially for tear trough support
- Glide laterally for contour
- Glide superiorly for mid-cheek lift
- Glide inferiorly for nasolabial softening
This entry covers four corridors from a single point.
And yes — the superficial layer carries you safely through all four.
The Chin, Jawline, and Tear Trough — A Preview
This chapter isn't their home, but the superficial fat layer plays a role everywhere, so a short preview is fair:
Chin
Superficial fat work smooths the labiomental transition and supports deep work later.
It gives you shape before projection.
Jawline
Superficial fat defines the border.
It lets you soften bumps, blend shadows, and prep the area for sharper deep work.
Tear Trough
Superficial work here (just above ORL) softens shadows, blends transitions, and prevents over-reliance on deep filler.
These will each get their own full chapters — this is just setting the stage.
Gauge Personalities — Choosing Your Cannula
Gauge isn't diameter.
Gauge is personality.
27G → flexible diplomat
Bends instead of injuring.
Perfect for learning.
25G → the all-rounder
Stable, directional, safe.
23–21G → tunneling beast
Powerful.
Useful in fibrous areas.
Requires judgement.
Can overpower ligaments if misused.
Entry Points — The Truth No One Admits
Anatomy varies.
Arteries move.
People aren't cadavers.
The only dangerous place is the parotid trunk.
Everything else is a matter of:
- Comfort
- Vector
- Plane consistency
- Wrist ergonomics
Pick the entry point that supports your injection plan.
Not someone else's diagram.
Fat Compartments — Why They Matter Here
Superficial fat is divided into compartments, but you don't need to be a cartographer.
You only need to know:
- Filler stays within compartments
- Boundaries cause tone changes
- Ligaments form walls
- You can feel when you cross from one to another
This gives you confidence that your product won't wander into the next postcode.
Why We Treat Superficial First
Because patients don't age from the bone outward.
They age from the surface inward.
When you restore superficial fat:
- Shadows disappear
- The face brightens
- Transitions smooth
- Jowls lessen
- Tear trough darkening improves
- The mid-cheek looks hydrated
- Deep filler becomes optional
Deep structure has its place — but it's Phase 2.
This is Phase 1.
This is the soft reboot.
The Order of Mastery — Superficial Edition
Nose — simple when you respect depth
Tear trough — finesse and ligament awareness
Cheeks — the most forgiving canvas
Nasolabial — anatomically busy, but controlled
Jawline & chin — where your judgement matures
Lips — not in this chapter, not this universe
Superficial mastery is 70% of injectable success.
Deep fat and periosteum are postgraduate work.
Final Word
The superficial fat layer is where injectors stop memorising and start feeling. It's where technique meets tissue, where anatomy becomes navigation.
You master this layer first. Everything deeper is just refinement.
💬 Dr. Haq Says:
"The superficial subcutaneous layer is where injectors stop guessing and start feeling."